Introduction
A common scenario - you want a product list with “Add to cart” functionality. Angular can do that - let’s see how effective it is.
You can find code in this repository - github
Goal
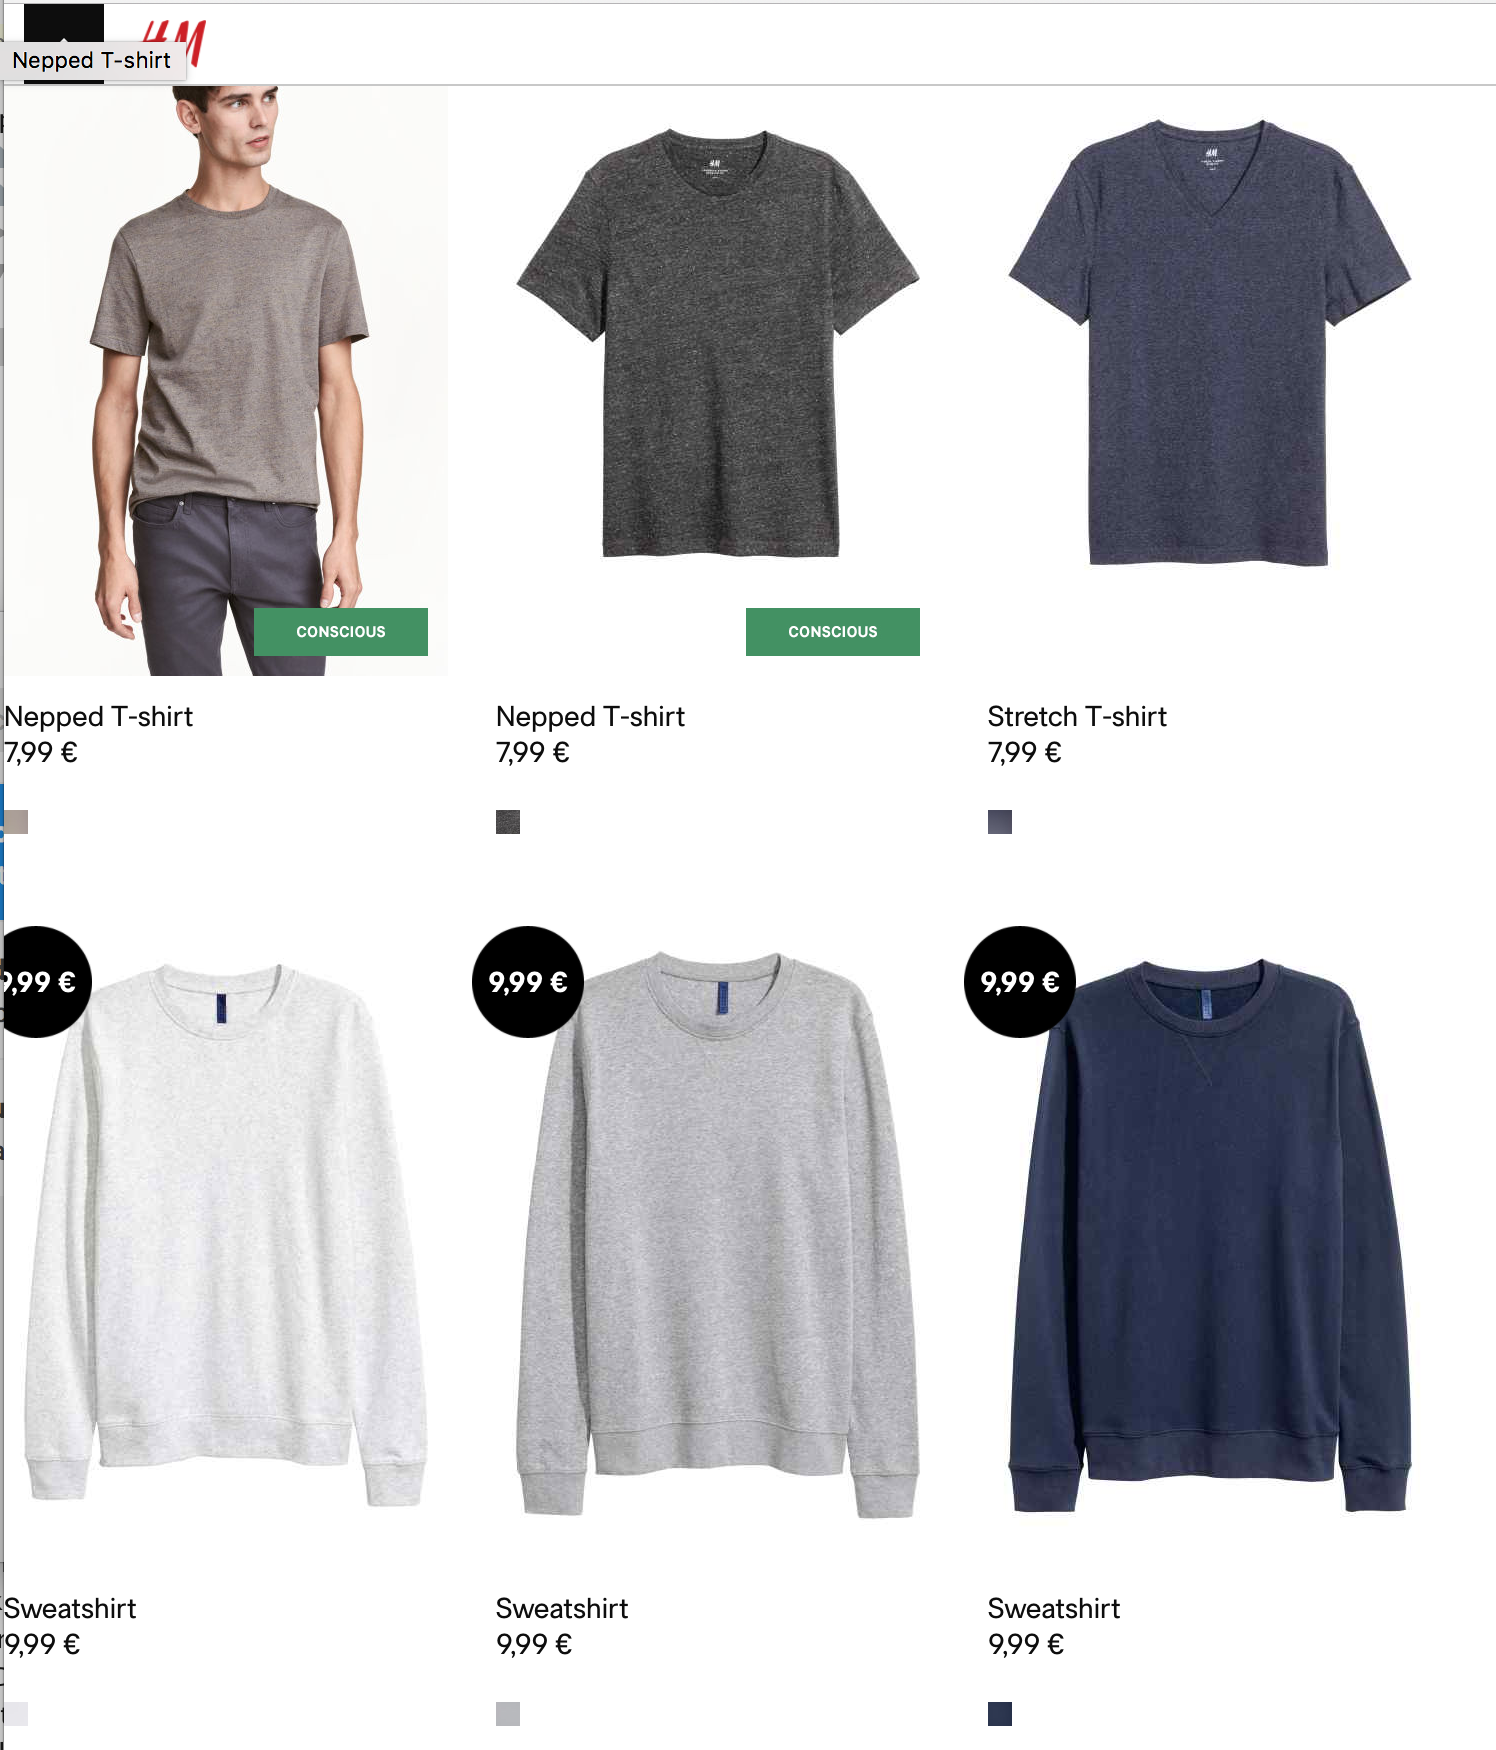
1. Product list with images, color filter, names and currency. We want to create something similar that H&M has.
2. Details of item
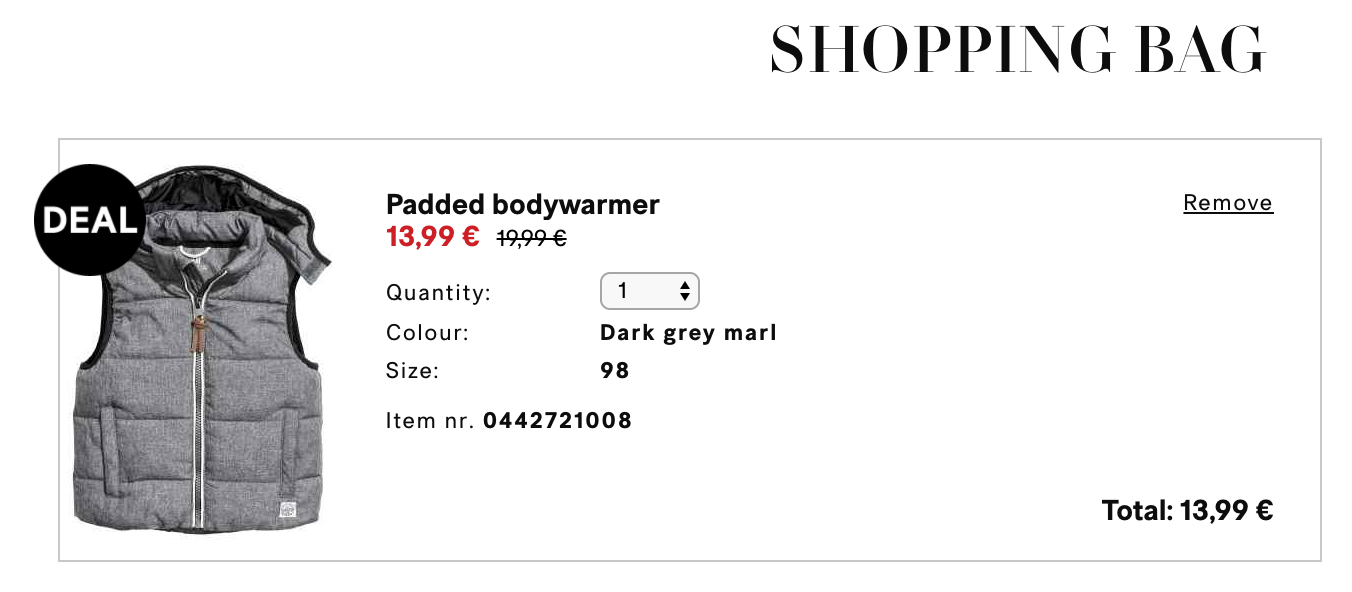
3. Shopping cart view
To view the details and remove items from it. You can see an image below.
Of course we want everything to be responsive and made with Angular. We will skip unit tests.
Setting up the project
Angular CLI seems mature enough for our needs. Let’s install it globally.
npm install -g @angular/cli
Let’s create project
ng new small-commercial-application
Project structure
Now for the project structure we want our routes to be lazy loaded. A convention is that lazy routed folders should start with +.
We can say that we will need two folders - for landing page and for cart page.
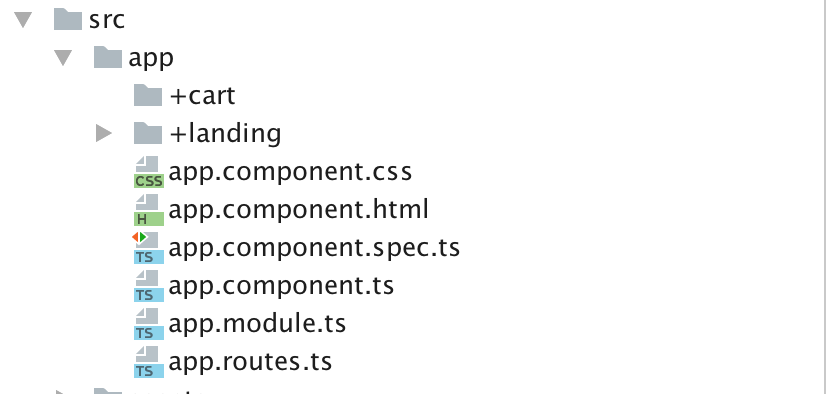
Also while we are at it - let’s create our routes file app.routes.ts where we will define root module routes. We will make these routes lazy a little bit later
export const routes: Routes = [
  {
    path: '',
    pathMatch: 'full',
    component: LandingComponent
  }
];
Ignore the part where LandingComponent is red. We will import it later.
What is left for routes is to include them into our app.module.ts
@NgModule({
  declarations: [
    AppComponent
  ],
  imports: [
    BrowserModule,
    FormsModule,
    HttpModule,
    LandingModule,
    RouterModule.forRoot(routes)
  ],
  providers: [],
  bootstrap: [AppComponent]
})
export class AppModule { }
We also will need to include LandingModule for now since we directly load it on /. Later we will change this.
Products list
I always like to start from the data. How will our data look?
Each item will have some data and it can have multiple colors assigned to it.
export type ItemColor = 'blue' | 'green' | 'gray';

export interface Item {
  id?: number;
  name?: string;
  price?: number;
  currency?: string;
  colors?: ItemColor[];
  picture?: string;
}
This interface should be a good starting point. ItemColor defines available colors which can be assigned to product. Sure they can be dynamic, but let’s keep our scope limited
Second, let’s think what kind of components we will need.
- Item which will represent a single product in a list
- ItemList which will represent list of Items in a list
- Landing which will hold our ItemList and ItemFilter components
For components creation we can utilise Angular CLI.
cd +landingmkdir componentsng g component item//will generate component inside a folder. Suits us perfectlyng g component item-list
Item component
Our Item component will need to display an image. Instead of getting images from some json file (encoded) we will do it lazy way - just use icon of image.
Just a dumb component where all info is passed to it. Because of this we can utilise ChangeDetection.OnPush which will increase our performance due to fact that it only needs to do changes when input data is changed
item.component.ts
@Component({
  selector: 'spa-item',
  templateUrl: './item.component.html',
  styleUrls: ['./item.component.css'],
  changeDetection: ChangeDetectionStrategy.OnPush
})
export class ItemComponent {

  @Input() public id: number;
  @Input() public name: string;
  @Input() public price: number;
  @Input() public currency: string;

  public getCurrency(): string {
    return 'USD';
  }
}
item.component.html
<div class="item-image">
  <i class="fa fa-picture-o fa-6"></i>
</div>
<div class="item-name">{{name}}</div>
<div class="item-price">
  {{getCurrency()}}{{price}}
</div>
item.component.css
.item-image {
  font-size: 6em;
  color: lightgray;
}

.item-price {
  font-weight: bold;
}
ItemList component
Okay - so we will want to overate a list of data and for each of the “row” display our Item. Pretty simple we can achieve this using ngFor
<spa-item *ngFor="let item of items"
          [name]="item.name"
          [price]="item.price"
          [currency]="item.currency"
></spa-item>
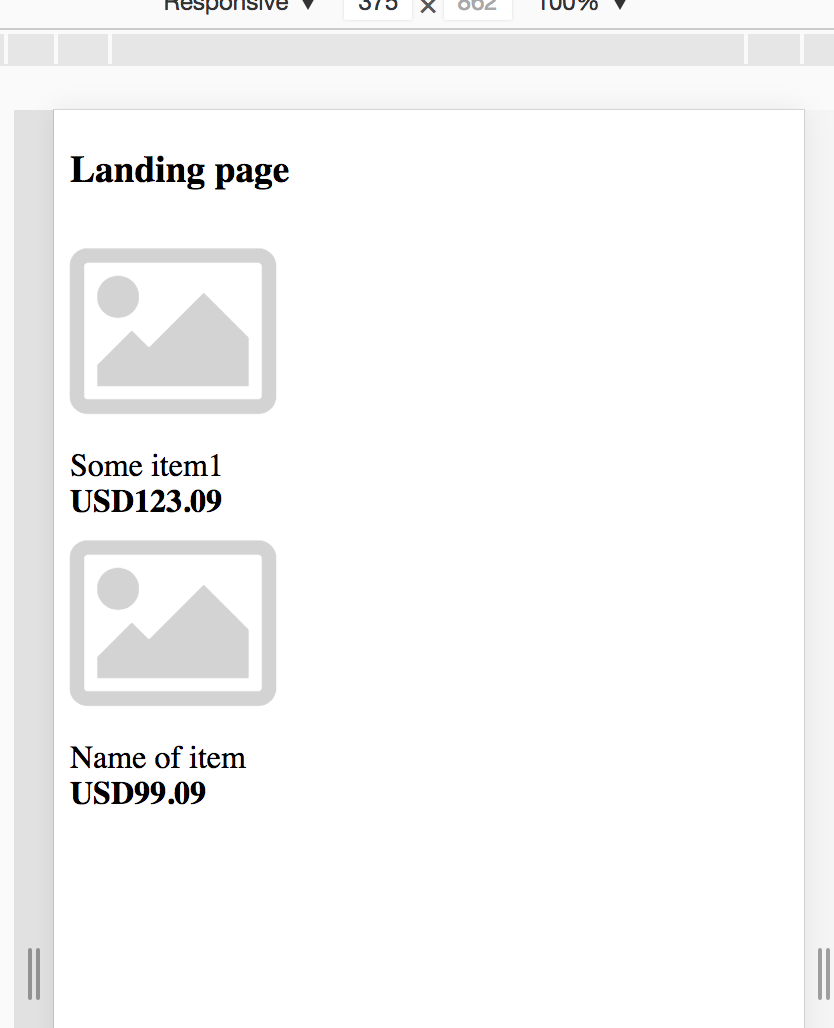
At this moment this is how our application looks (with some mock data passed down from Landing component)
Continuing - we want a grid view of our items. This is where flexbox can help us.
updated list-item.component.html
<div class="list-items">
  <div class="list-item" *ngFor="let item of items">
    <spa-item
      [name]="item.name"
      [price]="item.price"
      [currency]="item.currency">
    </spa-item>
  </div>
</div>
list-item.component.css
.list-items {
  display: flex;

  justify-content: center;

  flex-flow: row wrap;
  align-content: flex-end;
}

.list-item {
  margin-left: 10px;
  margin-right: 10px;
}
This is the result:
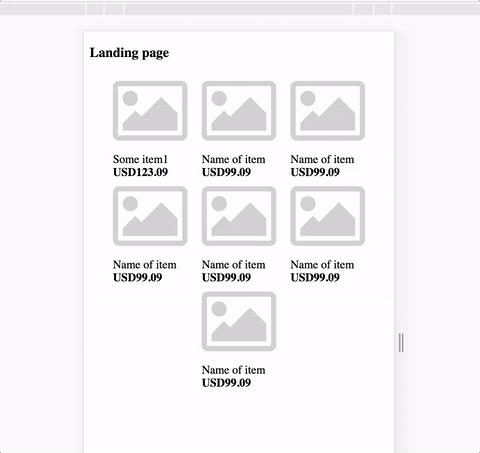
Aesthetically not the most pleasing look - but wrapping works as we expected. We can add more padding later.
Filters
Each picture has a color assigned to it. What we want is to filter our items by such filter. This component is more complex than the others, because of it need to interact. Good rule to go by when filtering data - keep original data structures and just transform it as you go.
As always let’s start with new component:
ng g component ItemFilter
==Now we will want our ItemList component to handle the actual data filtering. This this let us decouple logic early on and benefit us in the future. Especially if we will tie ngrx or similar store management into our application.==
==So our ItemFilter should only contain UI presentation logic of turning on/off, display filters. Not interaction with data.==
item-filter.component.ts
import {ChangeDetectionStrategy, Component, EventEmitter, Input, OnInit, Output} from '@angular/core';
import {ItemColor, ItemFilter} from '../../classes/item';

@Co mponent({
  selector: 'spa-item-filters',
  templateUrl: './item-filter.component.html',
  styleUrls: ['./item-filter.component.css'],
  changeDetection: ChangeDetectionStrategy.OnPush
})
export class ItemFilterComponent implements OnInit {

  @Input() availableFilters: ItemFilter[] = [];
  @Input() activatedFilters: ItemFilter[] = [];
  @Output() activeFilters: EventEmitter<ItemFilter[]> = new EventEmitter<ItemFilter[]>();

  constructor() {
  }

  ngOnInit() {
  }

  public filterColor(color: ItemColor): string {
    const colors = {
      'blue': 'blue',
      'green': 'green',
      'gray': 'gray'
    };
    return colors[color];
  }

  public filterActive(filter: ItemFilter): boolean {
    return this.activatedFilters.find(_ => _.color === filter.color) != null;
  }

  public changeFilterStatus(filter: ItemFilter) {
    this.activeFilters.emit([filter]);
  }
}
You can see that we are getting active and available filters through inputs and outputting changed filters through outputs.
item-filter.component.html
<div class="filter-list">
  <div *ngFor="let filter of availableFilters">
    <div class="filter-box"
         [ngStyle]="{ 'background-color': filterColor(filter.color)}"
         [ngClass]="{ 'filter-activated': filterActive(filter)}"
         (click)="changeFilterStatus(filter)"
    ></div>
  </div>
</div>
We also utilise ngStyle directive to set background color of filter. We do this for better maintainability in case we will want to make our filters dynamic.
item-filter.component.css
.filter-box {
  width: 1em;
  height: 1em;
  margin: 0.2em;
}

.filter-list {
  display: flex;
  flex-direction: row-reverse;
}

.filter-activated {
  border: 3px red solid;
}
Now for integration with ItemList
item-list.component.html
<div class="list-filter">
  <spa-item-filters
    [availableFilters]="filters"
    [activatedFilters]="activeFilters"
    (activeFilters)="updateActivatedFilters($event)"
  ></spa-item-filters>
</div>
<div class="list-items">
  <div class="list-item" *ngFor="let item of itemsAfterFilter()">
    <spa-item
      [name]="item.name"
      [price]="item.price"
      [currency]="item.currency">
    </spa-item>
  </div>
</div>
We grab our items from the function itemsAfterFilter() so we can filter the data according to active filters
item-list.component.ts
import {ChangeDetectionStrategy, Component, Input, OnInit} from '@angular/core';
import {Item, ItemFilter} from '../../classes/item';

@Component({
  selector: 'spa-item-list',
  templateUrl: './item-list.component.html',
  styleUrls: ['./item-list.component.css'],
  changeDetection: ChangeDetectionStrategy.OnPush

})
export class ItemListComponent implements OnInit {

  @Input() public items: Item[] = [];

  public readonly filters: ItemFilter[] = [
    <ItemFilter>{color: 'blue'},
    <ItemFilter>{color: 'green'},
    <ItemFilter>{color: 'gray'},
  ];

  public activeFilters: ItemFilter[] = [];

  constructor() {
  }

  ngOnInit() {
  }

  public itemsAfterFilter(): Item[] {
    return this.items.filter((item: Item) => {
      const matchesActiveFilter: boolean = this.activeFilters.reduce((prev, curr) => {
        if (item.colors.includes(curr.color)) {
          return prev && true;
        } else {
          return false;
        }
      }, true);

      return matchesActiveFilter;
    });
  }

  public updateActivatedFilters(filters: ItemFilter[]) {
    this.activeFilters = filters;
  }
}
Simple filter function with a little more complex reduce function inside of it does the job perfectly. Should fit most cases and be easy to refactor.
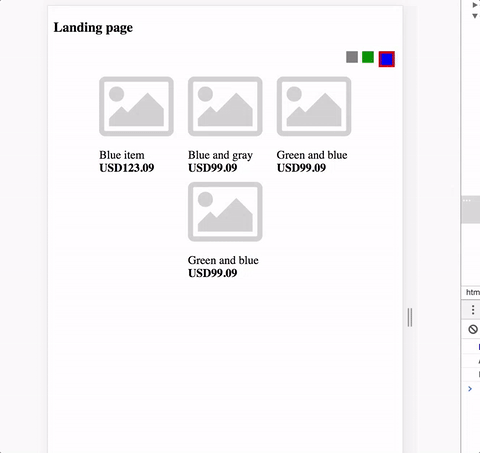
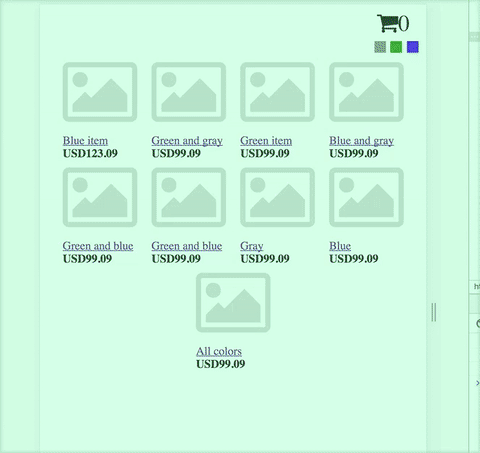
Let’s see how our application looks.
Item details
Clicking on item name should take us to another page where it’s details and “Add to cart” button is displayed.
Also at this point it makes sense to change Item to Product in our application just to avoid further confusion ahead. We don’t want our naming to be confusing us.
Next - let’s extract our products mock data from component to a separate service. Inject the service in app component. We are doing this so we can add another function to it which will return a specific product by id (which we will need for details).
==Later in the post we will refactor this service to serve observable instead of plain arrays to reflect real world application better==
products.service.ts
import {Injectable} from '@angular/core';
import {Product} from '../classes/product';
@Injectable()
export class ProductsService {
  public getProducts(): Product[] {
    return this.products();
  }

  public getProduct(id: number): Product {
    return this
      .products()
      .find((item: Product) => {
        return item.id === id;
      });
  }

  private products(): Product[] {
    return <Product[]>[
      <Product>{id: 1, name: 'Blue item', price: 123.09, colors: ['blue']},
      <Product>{id: 2, name: 'Green and gray', price: 99.09, colors: ['green', 'gray']},
      <Product>{id: 3, name: 'Green item', price: 99.09, colors: ['green']},
      <Product>{id: 4, name: 'Blue and gray', price: 99.09, colors: ['blue', 'gray']},
      <Product>{id: 5, name: 'Green and blue', price: 99.09, colors: ['green', 'blue']},
      <Product>{id: 6, name: 'Green and blue', price: 99.09, colors: ['green', 'blue']},
      <Product>{id: 7, name: 'Gray', price: 99.09, colors: ['gray']},
      <Product>{id: 8, name: 'Blue', price: 99.09, colors: ['blue']},
      <Product>{id: 9, name: 'All colors', price: 99.09, colors: ['gray', 'blue', 'green']},
    ];
  }
}
Next up - fixing the routes.
Okay so first app.routes.ts
import {Routes, RouterModule} from '@angular/router';

export const routes: Routes = [
  {
    path: '',
    pathMatch: 'full',
    redirectTo: 'products'
  },
  {
    path: 'products',
    loadChildren: './+products/products.module#ProductsModule'
  }
];
products.routes.ts
import {Routes} from '@angular/router';
import {ProductsComponent} from './products.component';
import {ItemDetailsComponent} from './components/product-details/product-details.component';

export const routes: Routes = [
  {
    path: '',
    pathMatch: 'full',
    redirectTo: 'list'
  },
  {
    path: 'list',
    component: ProductsComponent
  },
  {
    path: 'details/:id',
    component: ItemDetailsComponent
  }
];
Let’s go through the code. In app routes we lazy load the products module. In products routes we display list as default routes and also route to catch details with :id. So when user will click on item in products list - it will redirect to details page using that id.
product-details.ts
import {Component, OnDestroy, OnInit} from '@angular/core';
import {ActivatedRoute} from '@angular/router';
import {ProductsService} from '../../../services/products.service';
import {Product} from '../../../classes/product';

@Component({
  selector: 'spa-product-details',
  templateUrl: 'product-details.component.html',
  styleUrls: ['product-details.component.css']
})
export class ItemDetailsComponent implements OnInit {
  public product: Product = {};

  constructor(private route: ActivatedRoute
    , private productsService: ProductsService) {
  }

  ngOnInit() {
    this.route.params.subscribe(params => {
      const id = +params['id'];
      this.product = this.productsService.getProduct(id);
    });
  }

}
Subscribe to route and according to id - fetch the wanted product details. As for displaying them - let’s use the same Product component and add needed additional info.
product-details.component.html
<div class="product-details">
  <div class="product">
    <spa-product [name]="product.name"
                 [size]="'3'"
                 [price]="product.price"
    ></spa-product>
    <div class="color-list">
      <div *ngFor="let color of product.colors"
           class="color-box"
           [ngStyle]="{'background-color': color}"
      ></div>
    </div>
  </div>
</div>
As a side quest let’s add a back button.
At top of the product-details.component.html
<div class="nav-bar">
  <a routerLink="/">Back</a>
</div>
Yep - that simple.
Shopping Cart
Cart is a place where items will be placed. A good place to start is with cart service which can be injected into app and be utilised to keep track of what is in it.
Let’s make use of BehaviorSubject. It can be used in so many places that we can write a blog post of it own. As for now - think of it as Subject which hold last value. So when we subscribe - we get what it holds.
cart.service.ts
import {Injectable} from '@angular/core';
import {Product} from '../classes/product';
import {BehaviorSubject, Observable, Subject, Subscriber} from 'rxjs';
import {of} from 'rxjs/observable/of';
@Injectable()
export class CartService {
  private itemsInCartSubject: BehaviorSubject<Product[]> = new BehaviorSubject([]);
  private itemsInCart: Product[] = [];

  constructor() {
    this.itemsInCartSubject.subscribe(_ => this.itemsInCart = _);
  }

  public addToCart(item: Product) {
    this.itemsInCartSubject.next([...this.itemsInCart, item]);
  }

  public getItems(): Observable<Product[]> {
    return this.itemsInCartSubject;
  }
}
We push new items to subject and let our application parts subscribe to it.
shopping-cart-component.ts
import {Component, OnInit} from '@angular/core';
import {CartService} from '../../../services/cart.service';
import {Product} from '../../../classes/product';
import {Observable} from 'rxjs';
import {of} from 'rxjs/observable/of';

@Component({
  selector: 'spa-shopping-cart',
  templateUrl: './shopping-cart.component.html',
  styleUrls: ['./shopping-cart.component.css']
})
export class ShoppingCartComponent implements OnInit {

  public shoppingCartItems$: Observable<Product[]> = of([]);
  public shoppingCartItems: Product[] = [];

  constructor(private cartService: CartService) {
    this.shoppingCartItems$ = this
      .cartService
      .getItems();

    this.shoppingCartItems$.subscribe(_ => this.shoppingCartItems = _);
  }

  ngOnInit() {
  }

}
At this moment all added items can be visible to shopping cart. But what we are missing - is the cool feature of reactive programming - we don’t see how adding items reflects other application states (although it happens behind the curtains).
We can show that by adding a number near shopping cart which indicates how many items we have in our cart. This way when we add new items that number will reflect our cart size.
app.component.ts
 public shoppingCartItems$: Observable<Product[]>;

  constructor(public location: Location
  , private cartService: CartService) {

    this.shoppingCartItems$ = this
      .cartService
      .getItems();

    this.shoppingCartItems$.subscribe(_ => _);
  }
<i class="fa fa-shopping-cart">{{(shoppingCartItems$ | async).length}}</i>
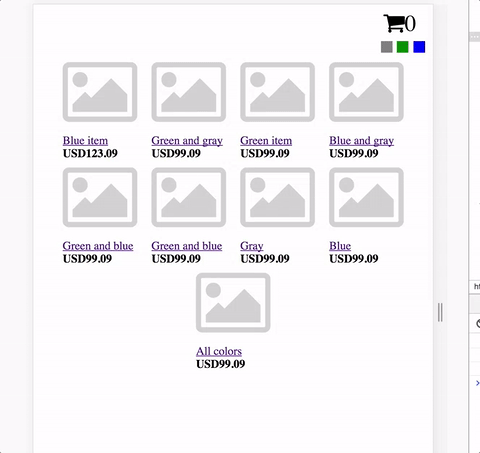
Let’s see how it looks:
Okay 3 major things are left:
- Total sum in shopping cart
- Delete button to remove item from shopping cart
- Items that are in shopping cart should be removed from product list.
Total sum in shopping cart
This one is easy. Let’s add some magic of RxJs in our cart.service.ts and be done with it.
  public getTotalAmount(): Observable<number> {
    return this.itemsInCartSubject.map((items: Product[]) => {
      return items.reduce((prev, curr: Product) => {
        return prev + curr.price;
      }, 0);
    });
  }
This will return us an Observable to which we can subscribe and get our total.
Delete button to remove items from shopping cart
Again - just an additional function in cart.service and button in shopping cart.
  public removeFromCart(item: Product) {
    const currentItems = [...this.itemsInCart];
    const itemsWithoutRemoved = currentItems.filter(_ => _.id !== item.id);
    this.itemsInCartSubject.next(itemsWithoutRemoved);
  }
Adding product to cart removes it from product list
This one is also pretty easy one since we have decoupled our app.
Inject cart service into our products component. subscribe to our cart items and filter items passed to ItemList to remove those we have added. Yep - that easy.
  this.cartService
      .getItems()
      .subscribe((items: Product[]) => {
      // remove items that are in our cart
        const allItems = this.items;
        this.items = allItems.filter(_ => {
          return !this.itemIsInCart(_, items);
        });
      });
  }

  private itemIsInCart(item: Product, cart: Product[]): boolean {
    return cart.find(_ => _.id === item.id) != null;
  }
And a magical this.router.navigateByUrl('/'); to addToCart function will redirect user back to products list when he has added an item.
As we went by with tasks. I had to do a bit of refactoring due to changes in our application. For example products service function were transformed into observables to represent real world data. (We don’t know when it will come and form where)
Ok let’s see how it works.
At this moment we have few problems left:
- No look n feel
- You cannot disable filters
- You cannot choose a color when you are adding an item to shopping bag
But IMHO that is enough for now.
You can find code here - https://github.com/benetis/didactic-computing-machine/tree/master/angular/small-commercial-spa
Feedback
If you have any suggestions - I am eagerly waiting for feedback. https://benetis.me/posts/contact-me/